Taggin’ with Louis C.K.

17 December 2011
Louis C.K. Live at the Beacon Theater

Louis C.K. Live at the Beacon Theater. Click to enlarge.

I just got on this bandwagon. Louis C.K. is doing something pretty special with this special. I bought it, expecting to download an SD 640 x 360 video file, probably in H.264. I was pleasantly surprised to find that there were two sizes available, 720p and a just-under-NTSC 800 x 448 SD version, both in an iTunes-friendly H.264/AAC format. I downloaded both. They were not prepared for iTunes, so I figured this was a perfect opportunity to create a tutorial on the subject.

The two files will become what I call a “HD•SD” package, which is an iTunes Store standard that includes a 720 HD file and an SD file. They appear as one item in iTunes with a HD•SD badge:
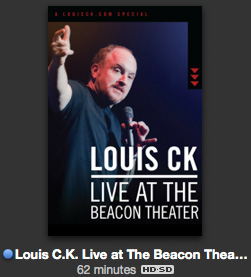
Appearance in iTunes

Appearance in iTunes

Mr C.K. was canny enough to provide an actual DVD label on his site, so I didn’t have to cobble together art. I downloaded the PDF, cropped it, resized it, added a little black at the bottom to get my 1000 x 1500 pixel ratio, and saved it as a new file. You can download it from here.

We then open both files in Subler. Edit one, then copy the tags to the other. I’ll start with the HD version. Click the Other Settings tab:

Editing, Stage 1

Editing, Stage 1

Change the Media Kind to Movie. Because this is the HD version, check the HD Video checkbox.

Click the Artwork tab and drag in your edited artwork file:

Editing, Stage 2

Editing, Stage 2.

Finally, we fill out the tags. Special notes:

  • All the data for the tags came from Louis’ site and the DVD label. You can download a PDF from here that contains all the data for the below tags.
  • The Artist, Album Artist and Studio are all the same: the name of the studio, in this case, Pig Newton, Inc.
  • I like to put the encoding tool in the Comments tag so that I can use playlists to find videos encoded with HandBrake 0.9.5 (you can’t use the separate Encoding Tool tag as a criterion). Interestingly enough, Encoding Tool was the only tag these files originally had, and the value was HandBrake 0.9.5, so Mr. C.K. uses the same tool that I do!
  • I’ve used the Australian rating that I guessed applied, which is MA15+. Choose the appropriate rating for your country.
  • The tag contentID is a unique code that the two files must share. iTunes sees this code and knows that it must bundle the two files together. I use the date, followed by a sequential number, so for the first set that I tag on 17 December 2011, it becomes 2011121701. The second set of two will become 2011121702, etc.
Editing, Stage 3

Editing, Stage 3. Click to enlarge.

Do the same process for the SD version, except you won’t check the HD Video checkbox. Select All of the tags in the Metadata tab, copy and paste into the other window. Save both and drag them into iTunes where they will be filed appropriately.

I tested the files, too. The HD version works on the old Apple TV, the Apple TV 2 and the iPad (and will also work on the iPhone). The SD version will not sync to a Classic, unfortunately, but given that I never watch movies on my Classic, it’s no great loss. You’ll use the SD version on your iPhone or iPad to save space.

I hope this is useful to all who buy the special and is my contribution (other than payment) to Mr. Louis C.K.’s grand experiment.


Square TV Art Revisited

22 August 2010

Following up my earlier post on this, I’ve now made a complete move towards square art with a footer containing the name of the TV show. I don’t know why I didn’t do this earlier. It looks so much neater than just a screen shot, because it’s always a uniform size and the footer helps with identification.

With screen shots, you’re dealing with either 4:3 or 16:9 aspect ratios (Star Wars: The Clone Wars is a rare exception–it’s presented in 2.35:1). I settled on an 800 x 800 pixel size. This allows me to scale up or down a moderate amount so as not to introduce too many artifacts. I use a footer of 300 pixels high for 16:9 content (576p scales down a little) and 200 pixels high for 4:3 (576p scales up).

I usually use a solid colour for the footer and this is sampled from the artwork that I use for the whole season. Here’s an example:

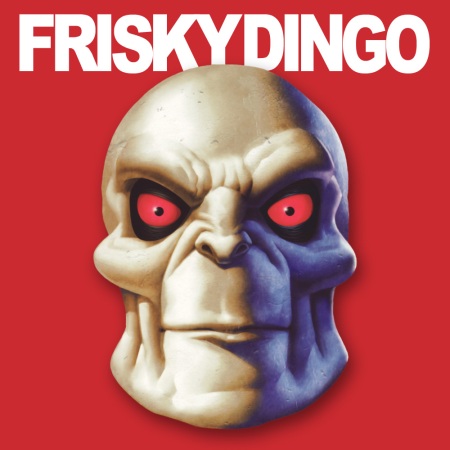
Frisky Dingo, Season One

Frisky Dingo, Season One (Season Art)

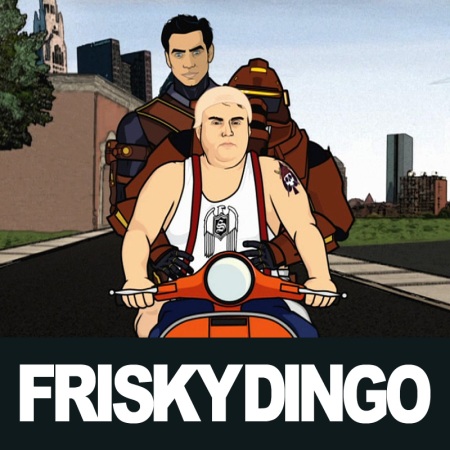
Frisky Dingo, Season One, Episode 4, "XPO"

Frisky Dingo, Season One, Episode 4, "XPO" (Episode Art)

Using a sampled colour connects the season and the episode art visually. When the season art changes, so does the footer:

Frisky Dingo, Season Two

Frisky Dingo, Season Two (Season Art)

Frisky Dingo, Season Two, Episode 8, "The Debate, Part Two"

Frisky Dingo, Season Two, Episode 8, "The Debate, Part Two" (Episode Art)

It’s more work, of course, but once I’ve set up the image as a Photoshop file with the footer and the TV show title, I can then bring in my screen shots as separate layers and save out as JPEG files. That keeps all the working files together in one file, with separate output files.

You can see all the Frisky Dingo artwork on my artwork site, Album-Art.net.


Losin’ Myself in Lossless

9 September 2009

Predictably, I’ve decided that, in contrary to what I said in my last post, I’m going fully lossless. That means that all CDs will be reripped as Apple Lossless. The journey will end.

I’m going to start with those CDs that have hidden tracks. As I’ve ripped my collection, I’ve been alert to unusually long final tracks, which often denote a hidden track. I don’t rip these in iTunes. I open the CD in the Finder and drag the final track to the desktop. I then open it in QuickTime Player, find and chop out the hidden track, save that as an AIFF and save the shortened original as an AIFF. I then drag these into iTunes and rip as Apple Lossless. I used to then rip those to 256Kbps AAC and store the Lossless originals in a folder archive, out of iTunes.

So that’s the starting point. Rip the CD minus the two last tracks, drag in the Lossless tracks, done.

Well, almost. They need to be “double-tagged“. I’ve started trialling Meta X. It’s not perfect. For a start, it wants to classify a Lossless track as a movie, a TV show or a music video. It thinks it’s video. I run the tracks through Lostify first, specifying a kind of  Normal (Audio). Meta X then respects this. Meta X allows me to write two tags that Lostify can’t: audio Content Rating and Purchase Date. This latter is a little flaky. If I enter 2005-05-29, it’s converted to Zulu notation and given a time as well. The date is always a day later, so the above example will appear something like 30 May 2005 6:00PM in the Summary tab of the Get Info dialog for a single track. I need to understand how Zulu time works.

I’ve got a database listing every single CD I’ve bought, with the date, supplier and cost, so I have the purchase data. I’m hoping a later revision will also present the Purchased By tag so I can finish the job with my name.

What about the other end of the equation, the real bottleneck, the iPod? I had an inspiration. My two-year-old 160Gb Classic would not be worth too much now, especially after tomorrow’s iPod event, so I’m better off keeping it. The solution is simple: buy an additional Classic and run two Classics to hold the library. I would have put off getting an additional Classic until next year but the free space is being consumed at an alarming rate and I’ll run out in about a month. Two Classics, especially if the new one tomorrow is 160Gb or greater, is the solution until that fabled 500Gb iPod Touch becomes reality.

I tried to work out how much space to expect Lossless files to take up, but the math is difficult. I believe Lossless compresses at different rates depending on the audio pattern. For example, the last track of Massive Attack’s 100th Window, Antistar, is bigger than the hidden track, LP4, even though LP4 is much longer. LP4 is little more than 11:23 of static, which is super-efficient to compress. It will take months, probably a year, given all my projects, before I could rerip everything, so space will not be an immediate concern.

So that’s my journey. Light at the end of the tunnel at last. Enjoyable all the way.


Managing the iTunes Plus Upgrade Process

3 February 2009

If you haven’t modified any of the tags for the music you previously bought from the iTunes Store, then the tags for the Plus replacements should match. The Plus tracks will have a new Date Added but otherwise will appear the same. The average user will be unaware of the change.

Fiddlers like myself will get into trouble if they simply do an upgrade as the tags won’t match. I always make sure my purchased music has a release date, that the album name and track number is correct (free song-of-the-week titles are usually wrong). I complete the tagging of music videos (usually they have a name and little else). I may replace the album art with one of my superior scans. You get the idea. Here are my recommendations for upgrading, all of which I followed in my own recent upgrade.

Download on a Different Computer or Library

My library is on my desktop machine. I downloaded on my laptop, which I use as a workspace to tag music before I merge it with the main library. The laptop is authorised for my iTunes Store account as is the desktop. The songs to upgrade are tracked by the Store from its own records, not based on the presence of any tracks in the library you are working with, so you can download to a different computer, even if the original songs are not there.

Alternatively, if you don’t have a secondary computer to work with, you can create a new, separate library to download to. Quit iTunes, then relaunch while holding down the Option key (Mac) or Shift key (Windows). This will bring up a dialog where you can choose an existing library or create a new one. Create one on the desktop for ease of finding in a later step. Log into the iTunes Store, click the iTunes Plus link, buy what you want (you can select what you want to upgrade now–you’re not forced to upgrade everything) and download it.

Merging with the Main Library

In this step you’ll add the new files to the existing library for checking against the originals.

If you’re using the double-library approach, quit iTunes and relaunch while holding down Option or Shift. Choose the main library. Once iTunes has launched, create a new static playlist called iTunes Upgrade. Open the iTunes library folder on the desktop. Burrow down to the iTunes Music folder and drag that folder into the new iTunes Upgrade playlist. If you downloaded on another machine, get the files across by any convenient method and drag into the playlist. As soon as one track has finished copying, hold down the Command key (Mac) or Control key (Windows) and click the checkbox next to the name. This will uncheck all the tracks and prevent them from being synced to your iPod or Apple TV before you’ve finished editing them.

Editing the Tags

Now you’ve got two sets of files: the original 128kbps protected files and the new 256kbps Plus files. Sort the playlist by Album and find the first album in the main body of the library. Change the tags of the Plus song to match that of the Protected song if necessary.

Empty the trash. Click the Plus song and delete it. Don’t empty the trash. Right-click the remaining original protected song and select Show in Finder (Mac) or Show in Windows Explorer (Windows). This will open a window with the actual file location of the song. Drag the Plus file out of the trash and put it in the song folder. Throw the protected file in the trash and empty it.

Now you’ve broken the link to the song in iTunes because you’ve deleted the file but not the database record. We do this to preserve the Date Added value, because this cannot be changed unlike other values such as Date Last Played.

Click on the song and Get Info. iTunes will tell you it can’t find it and ask if you want to locate it. You do. Navigate to the Plus version in the original location and click the Open button. Now you’ll see the Get Info dialog for that song. iTunes will also update the record to reflect that the song is now 256kbps but other metadata such as Last Played, Play Count, Rating and of course, Date Added are unchanged.

Special Considerations

This is the main procedure. You may find that the original tracks are no longer available and you may be offered an alternative, or (theoretically) they will be ignored in the upgrade process. For more on this, refer to my earlier post.

Be careful with the Finder/Explorer hack, especially the step where you choose the “lost” file. If you choose the wrong one you’ll change the record in iTunes and you’ll have a duplicate on your hands. Fixing it is messy. You would have to select the two duplicate records and delete them, which will put the file in the trash. Drag it back into iTunes and you’ll recover it to the original album, but you’ll lose all that lovely metadata for both the original song and the one you were trying to map. You’ll have to also drag the song you were trying to map to into iTunes.

Summary

I’ll admit that it’s a bit of work and if you have bought an awful lot of songs it probably isn’t worth it, but for perfectionists like myself who haven’t bought much, I think it’s a good idea from the perspective of maintaining valuable metadata.


Uses of the iPhone for Photo Management

20 October 2008

I don’t often talk about photos but have been experimenting with a use of the iPhone for photo management. I have a nice camera that takes good photos, but it doesn’t have GPS. When I was at Sculpture By the Sea yesterday, I began each shoot of a particular work with a photo from the iPhone. The purpose of this photo was to record two pieces of information: the GPS coordinates and the number marker so that I could look up that work in the catalogue for tagging the photo in iPhoto. I wanted to avoid this marker in any photo I took with the camera but still needed to know what it was. Here are the two photos:

“On the Beach” (Tim Kyle) (iPhone Version)

“On the Beach” (Tim Kyle) (iPhone Version) (Click to enlarge)

“On the Beach” (Tim Kyle) (Camera Version)

“On the Beach” (Tim Kyle) (Camera Version) (Click to enlarge)

I didn’t bother with aesthetics for the iPhone photo such as composition, as it was performing a strictly documentary role. As a result, all of them looked awful except for this one, which was passable. I found it easy to pull the iPhone out for the reference shot, partly because I keep mine in a holster, and partly because I took about 10 photos of each piece, so I wasn’t handling both cameras all the time. I can see that this won’t always work, but it’s a way to add GPS data to your photos if you don’t have one built in. The camera in the iPhone is unsophisticated but I find it great for two purposes. Firstly, quick and dirty recording of data, such as the above, and things I see such as DVDs I want to buy. Quality is of no concern with this usage. The other usage is aesthetic art, which is a challenge given the limitations, but no less worthwhile for it. If you can get an aesthetically pleasing photo with the iPhone, you’ve really achieved something.


Net Labels: Free Music for the Taking

16 October 2008

A net label is a website that offers free music. It is distinguished from a site that offers a random selection of tracks by these factors:

  • The music is organised into titles, analogous to singles, EPs, albums and compilations
  • Often the work of a single artist is the subject of a title
  • Artwork accompanies the title, often of high resolution and intended for printing, so that jewel cases can be created for the title if burned to CD.

The music is given away for free. There are a number of reasons for this. The artist doesn’t want to release commercially, they are a hobbyist, the free work is promotional, etc. This means it’s legally free and legal to give to others. Often a Creative Commons licence is employed.

Those raised on a diet of commercial music will ask if the music is any good. In my opinion, the music from net labels is often very good in terms of skilled technical execution and aesthetic appeal. Rarely do I feel that a track is amateur. The point of the net label is to treat an artist’s music with respect and thus the resemblance to a commercial label operation.

I like music I can chill out to, so I have focussed on net labels that provide this type of music. Here is a list of sites that I consider to be the best.

  • Alpine Chic: Swiss electronica at its best.
  • iD.EOLOGY: German electronica, dub and hip hop.
  • Mercedes-Benz Mixed Tape: Awesome ephemeral compilations released every six weeks. A marketing vehicle for Mercedes, promoting it as a lifestyle brand. Each compilation is a mix of electronica, pop, RNB and hip hop, sometimes featuring known artists, but mostly a platform to present up-and-comers. As each new compilation is released, the previous is deleted, so these are collectables.
  • Jahtari: Amazing blend of low-tech computer music and reggae and dub. It really works.
  • Lo-Kiwi: Electronica.
  • Petit Poulet Records: Electronica.

These sites vary in that they can be considered net labels for individual artists, in other words, their own label. They still present their music in titles, so I consider them net labels.

These sites are still good, but I don’t always like the music. That’s just my opinion of course. The music still has that skilled technical execution, so it’s still good.

  • Monotonik & Friends: Huge repository of electronica and glitch/bleep (scratchy-sounding music created with low-tech computers). The titles vary widely in style, thus I don’t like everything on the site.
  • Autoplate/Thinner: Sister sites that specialise in glitchy electronica.
  • Electrobel: Electronica, some glitchy.
  • Offaudio: Spanish site. Beatier, dancier electronica.
  • One: Electronica.

Tagging is the one area in which they fall down. The tags are incomplete and lack artwork. Artwork is supplied separately, of course, except in the rarest of situations, and can be reformatted for use as album artwork. The Mixed Tapes are the worst, because the album tag is different for every song and the compilation flag is not used. I like fixing these tags, however, and this, in combination with my dissemination of the music, is my contribution to their efforts.

To keep track of the various releases, I tag the Grouping field with the website and the release number. Often there will be a specific release number, such as iD049 (iD.EOLOGY). If none, I number from the earliest, starting with 01. A title may end up with a Grouping tag something like this: http://www.ideology.de (iD049). I then create a smart playlist that looks for all tracks with http://www.ideology.de in the Grouping field, and that’s my iD.EOLOGY playlist.

Net labels have serious works available to you for free. Use them well to greatly expand your music library.


“Double-Tagging” Your CD Audio Files

10 October 2008

iTunes Store audio files contain a number of tags that can’t be done in iTunes, so audio files ripped from CDs will lack these. I tag these myself in a process that I refer to as double-tagging. This is not necessary by any means but I like the sense of completion that I get from doing this. This technique only works on the Mac because of the software I use.

Open the files in the venerable Lostify. If you check the option to add a script to iTunes, then you can select a range of songs in iTunes, then select the Lostify… link in the Script menu.

I have based my selection of additional tags on what I have observed with iTunes Store files. The tags to add are Release Date, Kind, Copyright and Content Rating.

Release Date

The release date is something you will have to research. Luckily, most CDs will be covered on the internet. I use Wikipedia, Rate Your Music, official artist sites, record label sites and the iTunes Store itself. Bizarrely, the most unreliable sources for release dates are often the official artist sites and record labels. If you find more than one date, try to take the most common one.

A note on compilations and rereleases. Consider The Chemical BrothersBrotherhood. It’s a singles compilation, released on 2 September 2008. Instead of tagging individual songs with the year that they were originally released, I tag each with this release date. The thinking is that the title on which the songs appear was released in 2008, as a discrete unit, so that’s the date to go with. It has the added advantage of sorting properly in iTunes if you sort by Album By Year. If you have individual years for the songs, it will force the whole album to the front of the list, as iTunes interprets the earliest date that appears in the album as the album date.

It’s not so clear-cut with rereleases. I’ve got a 25th anniversary edition of Deep Purple‘s Machine Head. It was released in March 1972. My edition is obviously 1997. As the whole album is essentially intact and contains no new material, I have tagged this as 1 March 1972.

That’s another thing: sometimes you will not get a complete date. If you get, for example, March 1972, then make the release date 1 March 1972. If you get 1972 only, then make it 1 July 1972.

Kind

This should be set to Normal (Audio), unless you are tagging an audiobook, in which case it will be Audiobook.

Copyright

Begin this string with the Recording Copyright symbol ℗ (activate the character palette by pressing Command-Option-T, then do a search for it and add it to your favorites for ready access), then the year and the owner of the sound recording (not the artwork; these are sometimes separate), all obtained from the rear of the CD, the disc itself, or at a pinch, the iTunes Store.

That makes a very satisfying completely tagged file. You can admire your handiwork in the General tab of the Get Info dialog (copyright) and the Release Date column, which you can add to any view:


(Click to Enlarge)

Content Rating

There are three options here, Inoffensive, Clean and Explicit. The differences between these are important.

Inoffensive is the default and most iTunes Store songs are tagged as this. It doesn’t appear in iTunes. It is not possible to tag a track as Inoffensive with Lostify due to an unhandled bug, so leave it blank for now.

Explicit is self explanatory. If your CD mentions any kind of warning, then use this. Good for filtering out music that you don’t want kids to hear.

Clean is often misunderstood. It doesn’t mean Inoffensive. It is to be specifically used to indicate that it is a version of an explicit song, altered to remove explicit material. Sometimes albums in the iTunes Store are presented as both explicit and clean versions, so you can buy either. This could also apply to audiobooks and podcasts if they are altered, cleaner versions. There is very little call for this option.

I hope there are people out there that are as passionate about double-tagging as I am!


iTunes 8 Subtleties

15 September 2008

As I was skimming through albums in Grid view, by Artist, it struck me that the grid art was always the first title in alphabetical sequence. I wondered if I could change this to another cover as in iPhoto, by pressing the spacebar when hovering over a cover. Being iTunes, this of course started playing the first song from the first album for that artist. However, I found that if you skim to the cover that you want to represent the artist, right-click and select Set Default Grid Artwork, this will have the desired effect:


There’s a new Description tag in the Video tab:


(Click to enlarge)

You can use this to tag either audio or video. Note that while you can enter a huge amount of characters in this field, analysis with Lostify reveals that this is the short description, and anything over 256 characters is truncated when written to the file. If you import the file into another iTunes library, the description will be truncated.


In the Options tab, you can set whether an audio file is Music or an Audiobook:


(Click to enlarge)

or if a video file is a Movie, TV Show or Music Video


(Click to enlarge)

These are contextual based on file type and the tag is written to the file, not just the database, which is what earlier iTunes versions did. This is a good thing when transferring files to other iTunes libraries. Note that all these and more (Ringtone, etc.) are taggable in Lostify.


Nice new tagging options, but I’m going to stick with Lostify, as it still can access more tags than iTunes 8.


Podcasters: Beware of the Evil that is .mov

2 May 2008

Podcasters may not be aware of why they should not be posting video podcasts in the .mov format. .mov is a software “wrapper” that contains a minimum of two components: video and audio. The components can be in different codecs. So even if you believe that you are doing the right thing by using H.264 and AAC (you are), there are implications in using the .mov wrapper that you should be aware of.

.mov cannot be tagged. Well, a number of tags can be assigned in iTunes (notable exception being album art) but this only writes the tags to the database, not the file. This means that as soon as the episode is moved out of iTunes, it loses all the tags. In the case of podcasts, this includes, most tragically, the podcast flag and the long description. The only “tag” remaining is the title name and the disc and track number (if set), and this is only stored in the form of the file name. When you bring those episodes back into iTunes, they appear in the Movies library as 01 Episode 1.mov, etc, with no other tags. All that hard work from your RSS feed is wasted and is not recoverable.

A podcastee may have archived past episodes and want to reconstitute them into iTunes, or, as I have done in the past, handed them on to others so that they don’t have to download the episodes themselves. This saves lots of bandwidth. In either case, the results will be disappointing.

The MPEG 4 file format (.m4v or .mp4) is a wonderland of tagging possibilities. Cali and Neal, of Geekbrief.tv, for example, have recently started using one of my favourite tools, Lostify, to tag their .m4v (H.264/AAC) files as TV Show so that, in addition to all the embedded podcast tagging that iTunes does when the file is downloaded, they can be found in both the Podcasts and TV Shows libraries. Copyright, explicit, short description, etc. can also be tagged.

So my appeal to podcasters is to be aware of this and not to use .mov. The software you are using to create your files might be able to generate .m4v files. iMovie 08 will do it. Personally, I use QuickTime Player Pro to export MPEG 4 video (MPEG 4 or H.264) from .mov to MPEG 4 with the Passthrough option for both video and audio. This preserves the full quality of both components but regenerates them as a .mp4 file, the name of which is simply changed to .m4v prior to tagging (if H.264).


Audiobooks: They’ve Come a Long Way

11 December 2007

There’s never been a better time to play audiobooks. The 2007 iPods are extremely intelligent when it comes to enhanced audiobooks, which are AAC files with a chapter track. These are functionally equivalent to enhanced podcasts.

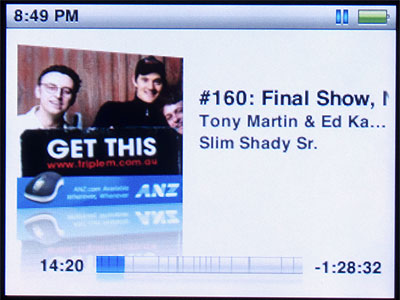
Modelling this look here on a 3rd-Gen Nano is the final episode of the much-loved but inevitably cancelled Australian national radio show Get This, with the actually rather-famous comedian Tony Martin and his lovable young roguish companions, Ed Kavalee and Armitage Shanks:

Get This on 3rd-Gen Nano

This file has been stitched together from the three-part podcast that consists of the entire final show minus the music. I’ve removed the beginning and ending ads, chaptered the file and tagged it down to the release date and copyright information. It’s now a .m4b file, no longer an MP3 podcast, and appears in the Audiobooks library in iTunes.

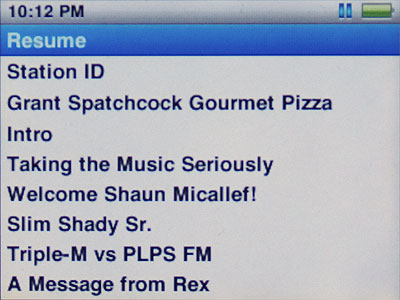
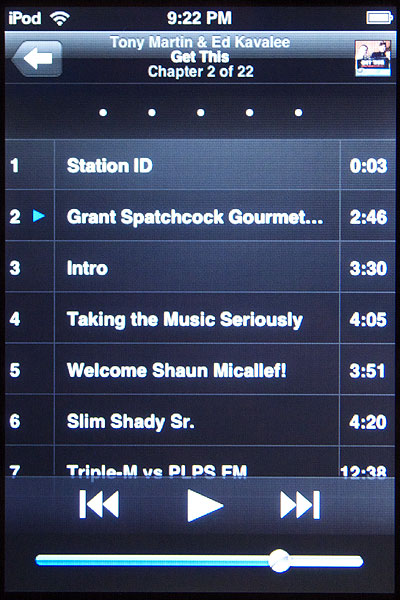
Note the third line down, Slim Shady Sr. This is the name of the currently playing chapter. The first line is the name of the overall track. The progress bar is divided into the chapter markers. If you click forward or reverse, it will jump one marker. What’s really cool is the fact that once you’ve clicked the audiobook in Music > Audiobooks, the Nano and Classic show you all the chapters, like you’re looking at a music album. If you’ve stopped playing somewhere in an audiobook, then return to this menu, there will be a new item at the top, Resume, which allows you to rapidly pick up where you left off:

3rd-Gen Nano Audiobook Menu

Here’s what this audiobook looks like on a Touch:

Audiobook on iPod Touch

The Now Playing screen looks like any music track, but if you flip the cover, the chapters are broken down into tracks similar to what you see on the 3rd-Gen Nano and Classic. No Resume option as above, but tapping the audiobook will pick up from where it left off.

Oh, and why is the podcast of a radio show considered an audiobook? The basic logic is that it’s not music, so it shouldn’t be in the music library and I consider podcasts to be ephemeral, so I like to move the ones I want to keep out of the Podcasts library. There’s no other place to put these. They are “spoken word”, so that’s the stretch I use, plus they do lend themselves to this type of treatment. And this type of content is considered an audiobook at Audible.com.

PS: If you would like the above file, you can download it from here for a limited time.